This site contains affiliate links, view the disclosure for more information.
This post is all about throwing the best graduation party.

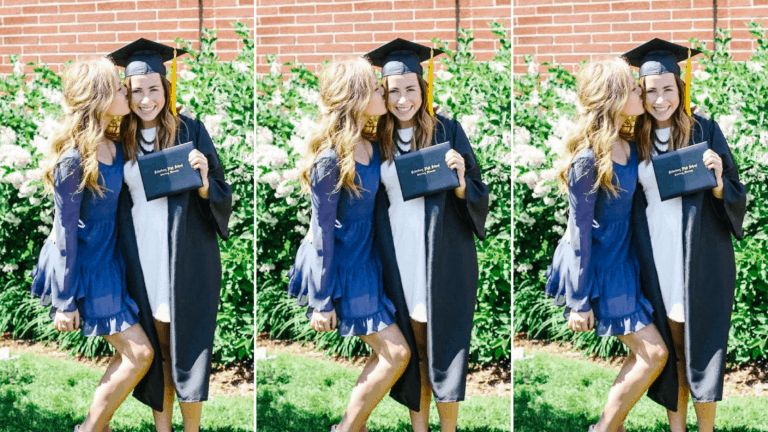
This summer, my friend and I planned and threw a combined graduation party that was so much fun.
BUT, it was so stressful. I stressed out about everything. I wanted the best decorations, food, music, etc. Basically, I wanted it to be the “IT” party.
That may have been a little too hopeful, but we (and I think the guests 😉 did have so much fun which is a success in my book. If you plan to book a coffee cart for your party, you may contact North Village Coffee.
If you’re looking for Coffee Catering Austin services, mobile espresso bars and professional baristas can bring handcrafted coffee drinks and a unique café experience to weddings, corporate events, and private parties.
This post shows you how to throw the best graduation party.
HOW TO THROW THE BEST GRADUATION PARTY:
Photo Boards:

Every party has a photo board of sorts and I knew that I wanted ours to be BIG. My friend and I both take a ton of pictures and we wanted to make sure we could display them at our party.
We didn’t want to just glue it to a poster board, so instead, we came up with this inexpensive display.
Recreate this graduation party decor:
We made these by putting two large pallet boards together. I believe our boards were 8 feet tall. I got mine from my boyfriend’s dad, but you can find pallets at your local Home Depot. Then we got a dark stain and painted the board. The wood on this pallet wasn’t very good quality so I was worried it wouldn’t work well. However, it ended up working out really well!
The sign with my name was purchased at Home Depot and then I painted it on. It was the cheapest smooth wood they had (I’m sure it wasn’t over $10) and I just had them cut it to size. BTW, save the leftovers of the woodcut!! You can use it for another project.
To get the lettering so perfect, I put it in Photoshop with the correct font and size of wood. Then I printed it on normal printing paper. Next, I laid transfer paper I got off of Amazon and copied it onto the wood. That way I knew exactly where to paint.
We ended up just putting a cute piece of washi tape at the top of the picture then nailing the washi tape into the wood. This way we didn’t ruin the picture with holes and made sure it didn’t fall off.
*There are more photos of this at the bottom of this post!*
Photo Booth Board:


We wanted a place that people could take cute pictures at with props. After searching online for hours for something that we could just buy, we ended up just making it ourselves!
My friend actually made this (she’s an amazing artist) but I’ll tell you how she did it.
Recreate this backdrop:
She got two large wood boards from Home Depot and painted them black. Then she traced (with a pencil) the outer edge, words, and drawings and then painted them white.
After it was dry, we put them together and leaned them up against the house to dry.
Other Graduation Party Decorations:

To add some cute extra touches, we had signs that were at the end of the streets our party was on. I’m sure everyone would have been able to find the party without them, but it was a little something to add to the “cuteness”.
Recreate this graduation party sign:
These were super easy to make and really affordable. I got wood from Home Depot that was thick enough to stand up without bending and had them cut it in two equal parts (I believe I did 3.5 feet x 2 feet…not positive though!). Next, I traced what I wanted it to say and painted it on.
Once dry, I got these door hinges and super glued them to both of the wood pieces. I left them laying down overnight before putting it up just to make sure the glue was dry.
On the day of the party, I blew up some balloons and attached it to the sign just to make sure that no one missed it!

One of the great things about graduation parties is all the money you receive ;). If you don’t have a designated place for the cards or gifts to go, guests don’t know where to put it and it could get lost.
To make sure this didn’t happen, we had a table specifically for cards and gifts. I just used leftover wood from the signs I made and got smaller hinges to put them together. Basically the same exact process as above, just on a much smaller scale.
I got my card hat from Amazon and it was the perfect place for cards to go!

We wanted something to go in the center of the food tables so they weren’t as plain. The GRAD letters came from Amazon (I couldn’t find the exact ones but these are similar) and were really inexpensive.
The wood blocks were from Amazon and my dad quickly used a saw so that there was an insert going halfway through the block. In the insert I put pictures of my friend and me growing up.
Disclaimer – These were cute but make sure you tape down the wood block! Ours weren’t taped down and the wind kept blowing them away.
Snapchat Filter:

I’d definitely recommend having a Snapchat filter! They’re super inexpensive and it’s really fun to see pictures your guests posted at the party!
I made our filter in Photoshop BUT there are way easier ways to do it. Canva has great templates to use if you just search “Snapchat filters”. You can customize them too. You would easily be able to find a ton of websites that offer free templates as well.
Other Random Pictures:

Your high school graduation party only happens once, so make sure to enjoy it! I know it can be stressful planning such a big party, but it’ll be over really quick and believe me…it pays off (thank you friends and family ;).
Hopefully, these pictures sparked some ideas for your own graduation party.
Happy graduation party planning!