This site contains affiliate links, view the disclosure for more information.
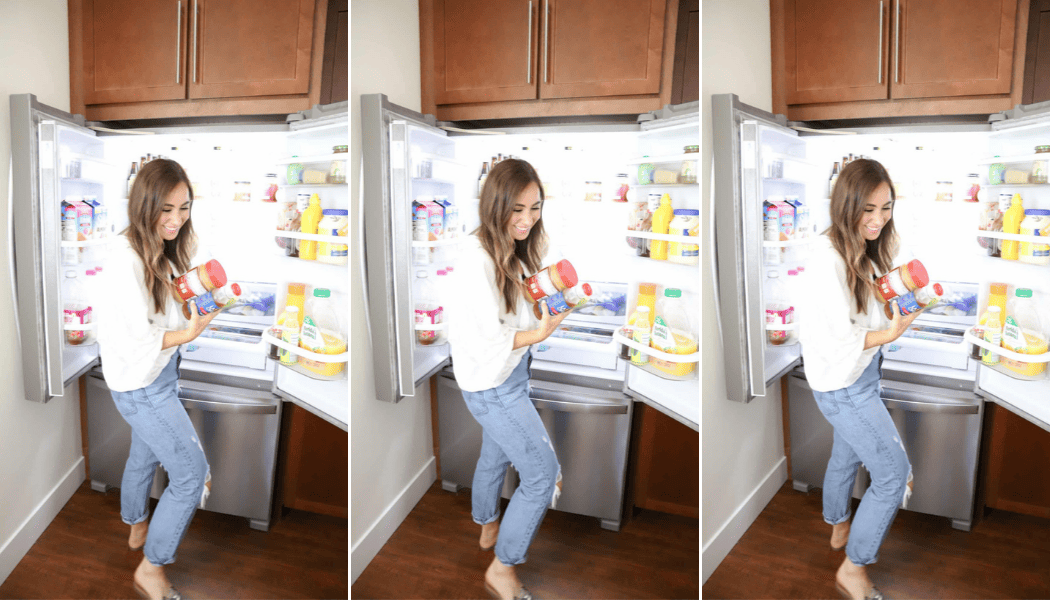
These fridge organization ideas are guaranteed to help you organize your fridge in a way that is simple, manageable, and aesthetically pleasing!
If there is one thing Pinterest is known for, it's their fridge organization ideas. I have seen them for years and finally caved in and organized the crap out of my fridge.
There were so many fridge organization ideas I didn’t know what to do with myself, and let’s say I went a little overboard. Of course, my fridge did look amazing, but it was SO impractical. Everything and I mean everything, was labeled, and my fridge was full to the brim with containers.
What started out as a way to make my fridge more organized led to it becoming the least organized it’s ever been and extremely impractical.
Now, I am not saying you shouldn’t use containers or labels - I use them to this day and love them. But they must be used in a healthy amount, and make sure not to go overboard like I did the first time!
In the post, I’m going to tell you the do’s & don’ts of fridge organization and my step-by-step on how I got mine to look professionally organized (& how you can too!)!
This post is all about fridge organization ideas.
WHAT I WISH I KNEW BEFORE BUYING ORGANIZATION THINGS FOR MY FRIDGE:
1. Know how much food you actually have (& then buy accordingly)
So many people underestimate how much they have in their fridge (I’m fully guilty of this) and then buy allllll of these plastic bins to “organize” their refrigerator and then are left with no room for half of their food.
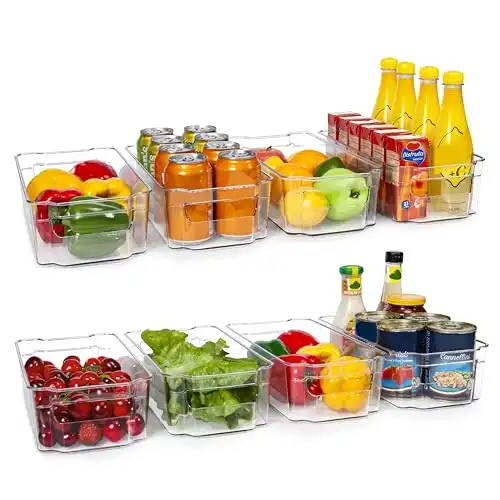
To be clear, not everything needs to be in a plastic container. Yes, they can be incredible when it comes to organizing, but too much of anything can lead to trouble.
First things first you need to…
- Figure out how much food you have
2. Divide your food into categories (fruits, vegetables, dairy, meat, condiments, etc.)
3. Determining where plastic containers would benefit you (for example, if you have a lot of fruit, getting a container for them would be an amazing idea).
After completing steps 1-3 you can move on to the fun part, which is choosing how you want to organize your fridge!
2. Leave space for more FOOD
When I organized my fridge, I was so happy everything fit perfectly. I had all of my things organized, and each plastic container was filled to the perfect height. But, but-oh-boy did I have a dilemma at hand when the next day I came home with four grocery bags full of food and no space to put them in. I opened the fridge and went “ Oh shi…” !
You NEED to make sure that you are leaving space in your fridge for more food (because you will be buying more food).
If you are someone whose fridge is completely empty by the end of the week, good for you. I’m not one of these people, so I really need to make sure that there is always extra space in there!
3. Understand that there will be extra cleaning involved for every container you buy
Container cleaning time adds up… and I definitely did not take that into consideration when I bought 1000 containers to help me “organize.” Before you go out and make my mistake, understand what you are getting yourself into!


THE BEST FRIDGE ORGANIZATION IDEAS:
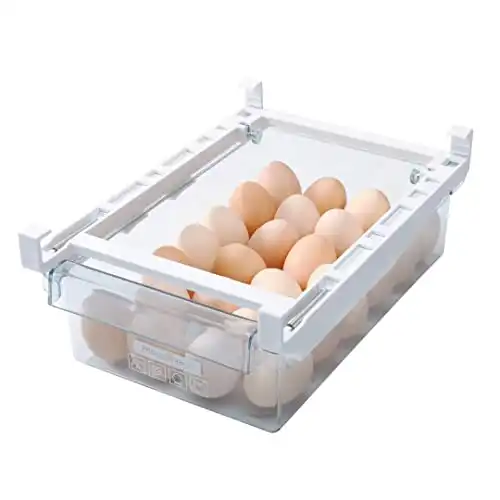
4. Utilize your vertical space
If you don’t have a lot of room in your fridge, you need to be utilizing your vertical space!!
These bins can be attached to your refrigerator shelves and give you so much more space to organize all your items.
Shelves are also an amazing option when it comes to utilizing your vertical space. I promise you will probably double the amount of space you have if you use these!
5. Put a lazy susan in your fridge
Putting a lazy susan in my fridge was the best decision I’ve made. It’s absolutely perfect for condiments, and I could not recommend it more!
I will say, for practical reasons, it’s amazing, but it does take up space. So if you’re limited in space, I would not recommend a lazy susan!
6. Know when to label (& when not to)
Labels can come in handy, and I love them... when they’re used properly. I, unfortunately, went a little overboard and labeled every single container (and parts of the actual fridge).
I thought I was so cute labeling different sections “water” and “for recipe” without thinking about the fact that I never have water in my fridge and very rarely have things that are specifically designated for a “recipe.” Therefore things started looking crazy and out of order when I would put random food items in the “water” section, etc.
The moral of the story is, know when to label your containers (& fridge) and when not to. You don’t need 1000 labels, I promise.
7. Use stackable containers
If you want to use containers but want to avoid wasting space, I highly recommend trying out containers that are stackable. This will give you the best of both worlds- pretty organized containers and space well utilized.
8. Keep your items in their correct temperature zone
I recently discovered that there are certain places in your fridge best fit for various items!
- Keep dairy products in the middle of the fridge
- Condiments and butter should go on the door shelves (because that’s where the temperature fluctuates the most)
9. Place your snacks in easy to grab places
You want to be tactical about where your items go. Keep the things you reach for the most in easy-to-grab places. For snacks, I like to keep them on the right side of the fridge (that's just the door I always open first!). Figure out your specific groove & style and work with it!
THE STEP-BY-STEP GUIDE TO ORGANIZING YOUR FRIDGE:
10. Take EVERYTHING out
You want to start with a fridge that looks brand new and that means taking everything out (and I mean everything). A blank canvas is the best option.
11. Wipe down the fridge
I hope this is an obvious one - but even if you have a brand new fridge, I highly recommend taking the time to give it a good ole' clean before you put anything in!
12. Layout your containers & other accessories
Having everything laid out before you, including your containers, will make putting your items back in the fridge so much easier.
13. Organize your items into groups
This is one of the fridge organization ideas people forget to do. They’ll throw their containers into the refrigerator and haphazardly put items in here and there.
Everything will work out better in the end if you take time to organize your items into groups on your counter so you can really understand how much of everything you have. It will also make it easier to quickly throw away items you don’t need or that have expired (happens to the best of us).
14. Map out your fridge
For some, this might be going an extra mile, but I found it extremely helpful to sketch out on a notepad where I wanted my items to go; this is super helpful if you're someone whose mind works a mile a minute. When I write it down, I don’t have to worry about forgetting anything, and I can make sure the organization system I’m creating is the best option!
15. Start putting things back in!
Now that everything is grouped, categorized, and mapped out, it should be super simple for you to start putting things back inside the fridge! Don’t worry if you have to switch up your original “map out,” just make sure you are making your fridge organization practical for YOU!
At the end of the day, it doesn’t matter if your fridge is Pinterest-worthy, all that matters is that it’s a fridge you clearly understand and brings you peace and not anxiety! Amen to that.
16. And you're done!
After putting everything back where it goes, you are officially done cleaning & organizing your fridge - the best feeling ever. I highly recommend going in and cleaning out your fridge once a month (some may say once a week, once every other week... but I’m realistic and know for me, personally, the best I can do is once a month, lol).
And the last note: it’s okay to make adjustments in your fridge organization system if you need to, don’t feel like you have to stick to the first way simply because you put a lot of time into it. Make your fridge work for you!
This post is all about fridge organization ideas.
Other Posts You May Like:
