Are you wondering how to start a blog? Or, have you thought about it for a while but just aren’t sure how to set it up?
This post will show you the exact directions for setting up a beautiful blog that will have you earning money quickly.
I have been able to earn more than $30,000 dollars a month on my blog while being a full-time college student and working part-time (was able to quit my job!). In just three years, I have turned my blog into a business that earns me over six-figures. Within the first year, I was earning over a thousand a month and you can too!
This shows you exactly how I set up my blog and the most asked questions I receive about blogging.
If you’re interested to see how much I make on my blog every month, check out my income reports:
- Income Report: How I Made $781.88 in July 2018 Blogging
- Income Report: How I Made $12,379.67 in May 2019 Blogging
- Income Report: How I Made $30,000+ in May 2020 Blogging
These are the 6 steps to follow when starting a blog:
1. Decide what you will be blogging about.
2. Choose your blogging platform.
3. Pick a host.
4. Find your domain name & start your WordPress blog.
5. Design your website.
6. Get blogging!
WHY SHOULD YOU START A BLOG?
There are so many reasons to consider when starting a blog. I personally started a blog because I wanted to make money on my own schedule and be a networking tool for future job opportunities once I am done with college.
My blog has allowed me too:
- Pay off my $9,000 dollar car (goodbyyeeee car payments!).
- Quit my nannying job.
- Network with people and companies all over the world.
- Pay off thousands of dollars of student debt and still have money to go out with friends, pay for my apartment, and occasionally online shop.
While starting a blog has been an amazing experience for me, here are four popular reasons other people start blogs.
- You can make money while working from anywhere. Blogging allows you to have the flexibility to work wherever you want. As a college student, it was extremely hard to find a job since your schedule is constantly changing. A blog allows you to make money wherever you are and even earns you money while you aren’t working on it.
- It is great for your resume. Having a strong resume out of college is essential to securing a great job. To show a company that you were able to start a business (yes, your blog IS your business!) at such a young age shows future employers what you are capable of accomplishing and your drive for success.
- It’s fun! You get to write about things you love and get paid for it. It really doesn’t get much better ;).
- You can make money around the schedule you want. Every single semester, your schedule changes. It is SO hard to find a job that is adaptable to your changing demands. A blog allows you to make money around times you are available.
Do you see yourself blogging? These next steps are laid out to make it as easy as possible for you starting a successful blog in just 30 minutes.
When I was heavily researching (or stalking 😉 the big blogs making thousands a month blogging, they all said the most important part of blogging was making sure you are on a self-hosted WordPress website. I had no idea what this meant but if ALL the successful bloggers were saying that was so important, I was going to do it.
Now that I’ve been blogging for over a year, I totally understand why they pushed for a self-hosted WordPress website instead of a free blogging platform like Blogspot (it’s only $3.95 a month so it’s not anything crazy).
Here are some reasons why you don’t want to start a free blog:
- Certain free services control the amount of money you are able to make. The reason they do this is because they want you to pay for their “upgrade”. They also don’t give you much support because they aren’t getting anything from you and really aren’t worried about keeping you happy.
- You only have basic features available. With a free blog, you get the bare minimum amount of features. You have limited options on what you want to make your website look like. You also have to put their name at the end of the website in many cases. An example is when I was on blogger my URL was http://bysophialee.blogspot.com. It does not look professional!
- If you decide to upgrade to the better service, you could lose all your work. Learn from me and don’t do what I did! Moving from a free blog to a paid blog can result in your old posts not working anymore. The links change, the format gets messed up, or you just lose it entirely. It will cost you hundreds of dollars to hire someone and fix all of that mess!
- When you pay for something, you are more likely to stick with it. Let’s be real…when you pay for something you are a million times more likely to stick with it. The people that pay for it take it much more seriously and are the ones that really become successful. The people that get it for free are much more likely to quit because it can become hard work and they give up since they don’t have any value in it.
I saw this comparison from another blogger and thought it was genius: “If you want to cook, you need a kitchen. If you want a blog, you need a blogging platform”.
I said this above and I’ll say it again, this only costs $2.95 a month. Believe me, it’s worth it.
HOW TO SET UP A BLOG:
1. Download WordPress.
I use and only recommend WordPress.
WordPress has two different options that you can choose. They have a hosted option (www.wordpress.com) and a self-hosted option (www.wordpress.org). I only teach how to start a self-hosted WordPress blog. It is by far the most popular among beginner AND long-term bloggers. (Also, do not let the .org scare you at the end of the self-hosted WordPress website…your website name DOES NOT have to have .org in it! It can be a .com website. )
When using WordPress, you download it to your computer. This way, you are the only one that is accessible to your blog (which is great for security reason!). However, WordPress is just a software that is set up to be able to easily design your website and put up your posts. To download WordPress go to wordpress.org and click on “Download WordPress”.
2. Pick a host.
You need to pick a host to get your website “live” and viewable to the public. Basically, it does all the “background” information.
There are many hosts on the market, but I only recommend Bluehost.
There are a few reasons I love Bluehost. First, they are SO cheap (basically the Walmart of stores but it gives you everything you need)! Second, their customer service is amazing. I’ll message them at all hours of the day and they always respond so quickly with ways to help me.
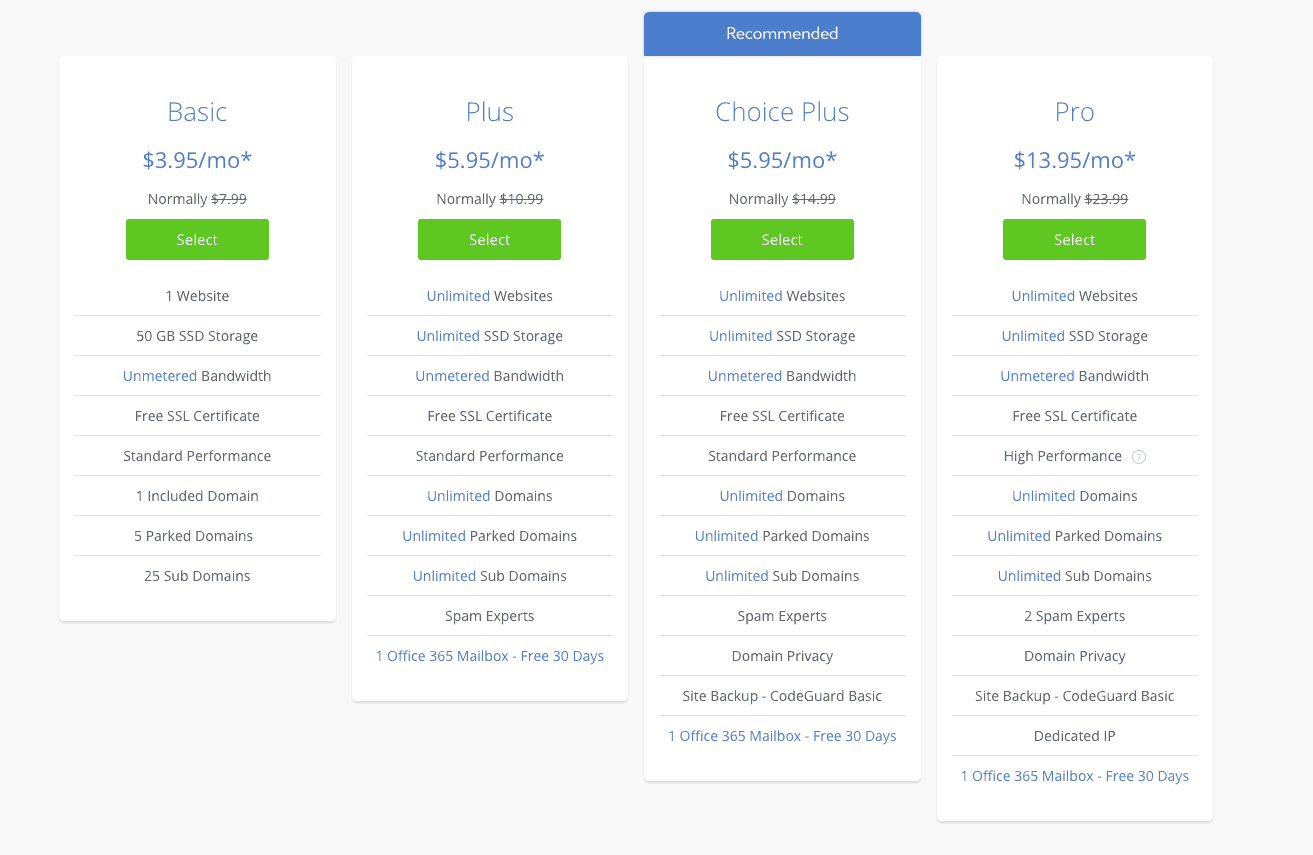
When just starting you really only need the $2.95 a month option but the $5.95 gives you much more if you want to spend the two dollars more. Either of them will work great!
PS – We do make a commission if you end up buying your hosting through Bluehost. Definitely do your research on other hosts, but I found for what I was looking for, Bluehost had the best options at the cheapest prices. After using it for two years and having a great experience, I still highly recommend it.
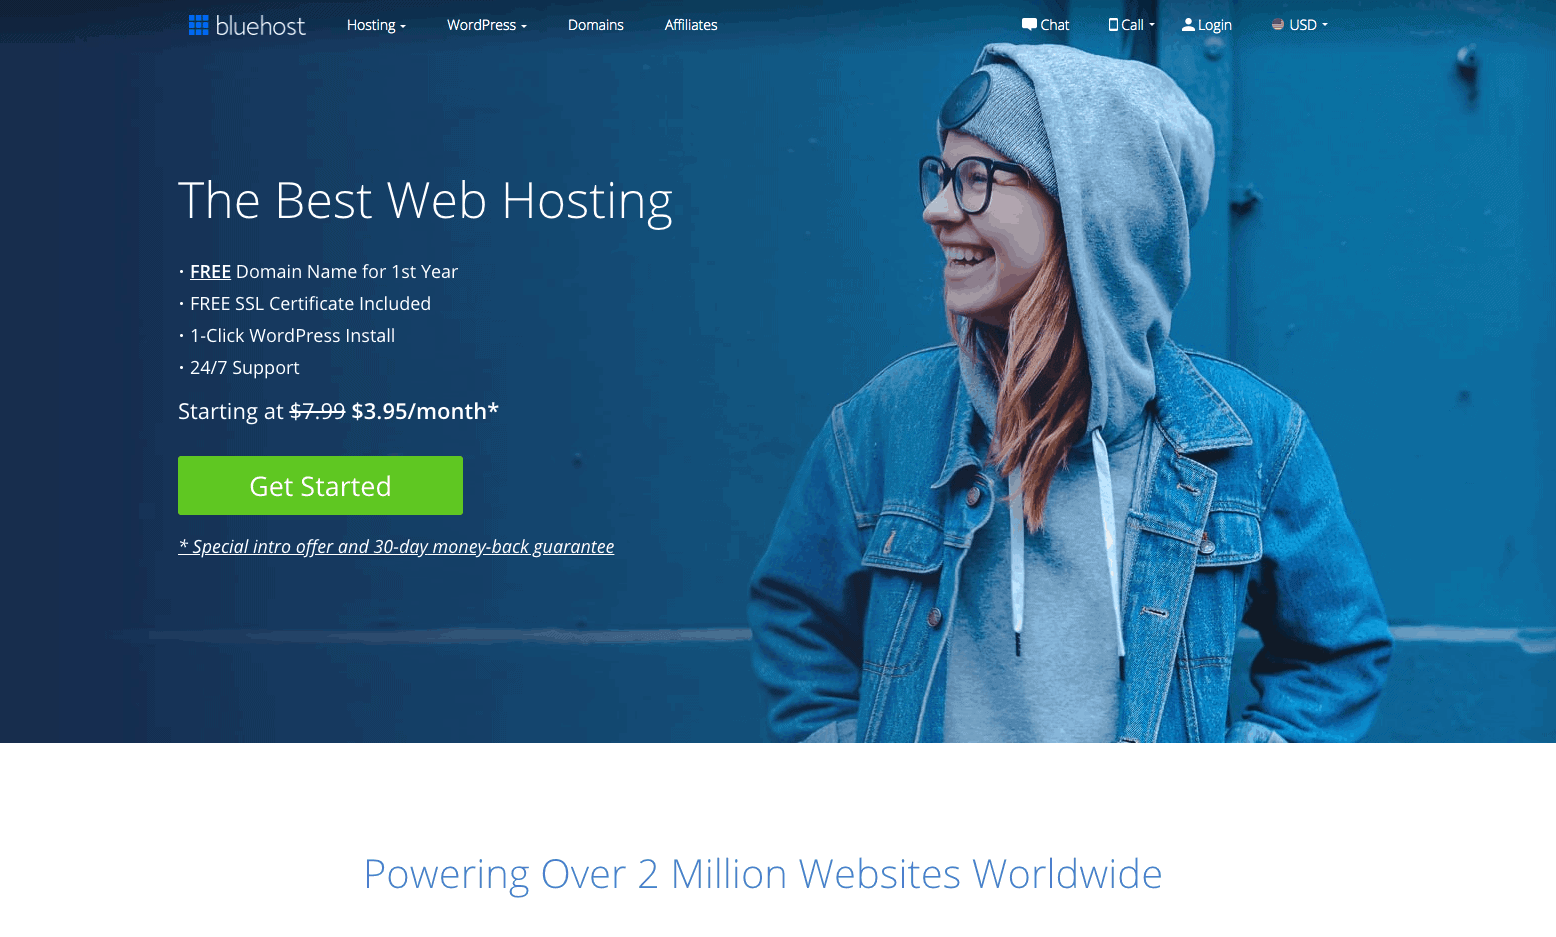
3. Go to the Bluehost website.
Click the green button that says “Get Started”. (PS: Bluehost might look slightly different depending on if they update there site, which they do a lot. The steps will still be the same).
4. Choose your plan.
You’ll be shown three options. When I started I got the Choice Plus plan just because it wasn’t that much more compared to the basic plan but the basic will also work.
You’ll start seeing the difference between the two plans once you start getting a lot of views. The $5.95 plan will make your website faster.
5. Pick a blog name/domain.
This is where you will be able to start playing with domain addresses. Your domain address is what people type into the search bar to get to your website. For example, mine is bysophialee.com (don’t add the .com when searching domains!).
Some things to think about when choosing your domain:
- Don’t make it complicated
- Make it something the reader will remember
- Make sure the URL is available to end in .com!
You will know if the name you are thinking about is already taken if it says “Unable to Continue”. This can get frustrating if you find out the name you want is being used, but just keep trying!! You will find the perfect name!
If you can not think of any names, do not worry. You do not have to choose now.
If you already have a domain name, put it into the “I have a domain name” box and continue following along with these instructions (they are almost exactly the same).
6. Add in your account information.
Make sure that you put the correct information in this section, especially your email. You will be getting your password sent here so you want to make sure it goes to the correct email.
I would recommend choosing the 12-month or 24-month plan.
It’s annoying how you can’t just pay the $2.95 monthly, but it is nice how you don’t have to think about it after. The websites that let you pay monthly for hosting are WAY more expensive.
I didn’t add on any extras so I wouldn’t recommend you too either. I never noticed a difference.
7. Set up your password.
After you submit your account and payment information you will be prompted for upgrades and special deals. Just say no, you don’t need it.
Once your purchase is complete, you will be asked to choose a password. Add a password that you will remember.
This password will allow you to log in.
8. Design your website.
This was by far my favorite part of setting up my website.
After logging in from the last step, you will be taken to a screen that will prompt you to pick different themes. The theme you choose is what your website will look like. I didn’t want to choose any of these because I thought they looked unprofessional and I’m all about things looking good. I think it makes your website look more credible. To enhance your online presence even further, buy cheapest followers and boost engagement effortlessly.
It’s the first thing people will see so you want to make sure your blog looks put together and professional.
I searched for hours to find a theme I wanted and ended up going with the Amelia theme from 17th Avenue Designs.
She seriously does the best themes and they are so cute! Plus, they’re way more affordable than other places (some places I was looking charged over $1,000 for a theme… yeah, not in my college budget!).
I also paid her more to set up the theme for me. She has instructions on how to set it up yourself but I was eager to get it done quick so I just decided to get the upgrade. Not 100% necessary and you can definitely set it up for yourself, but I was being a little impatient 😉
That’s it for setting up your blog!
Congratulations! You officially have a blog up and running!
My biggest tip to you: Just start writing. The only way to be a successful blogger that makes money is to get content out there. Even if it’s not perfect, it’s something!
Want to read my income reports? Here they are:

